Use the Image block to easily add an image to your page.
Add an Image block
To add the Image block, click the + Block Inserter button in the top-left corner of the editor. Search for the Image block and click on the block to add it to the page.
Alternatively, you can quickly add the Image block by typing /image and pressing Enter.

Detailed instructions on adding blocks
Initial options
After adding the Image block, you have a few options to choose to get started.
- Upload an image or video from your device.
- Choose Media Library to select an existing image or video on your site.
- Select Insert from URL to add an image from a specific web address.

Insert from URL
After choosing Insert from URL, follow the steps below:
- Paste the image URL and press Enter to add the image to the page.
- Select Upload to Media Library (up arrow button) in the block toolbar to save a copy of the image to your site’s Media Library.
- If you don’t upload the image to your Media Library, the image may stop displaying later if the original file is moved, deleted, or no longer shared.
Note: This option may not work with every image or website. Some websites block images from being embedded or copied this way. Only use images you have permission to use.
Additional ways to add images
There are also additional ways to add images:
Drag/drop images
You can drag and drop images from your computer onto a blank page or inside an empty Paragraph block.
Media tab
You can select images from the Media tab in the WordPress block inserter. If your theme supports Openverse, you can also select free-to-use images from the WordPress Openverse library. If Openverse is not available, the option will not appear in the inserter.
- Click the + Block Inserter in the top-left corner.
- Select the Media tab.
- Select an image from the Media Library to add to your page, or Openverse if the option is available.
- To replace an existing image on the page, drag an image from the Media tab onto the existing image.
After adding an Openverse image to your page, WordPress automatically saves it to your Media Library.
Copy images from a document
You can also copy and paste images into the editor from other tools, such as Microsoft Word or Google Docs. WordPress may automatically upload copied images to your site’s Media Library. To confirm, select the image and check whether the block toolbar shows Upload to Media Library (up arrow button). If it does, select it to save a copy of the image to prevent it from breaking in the future.

Update image details
After uploading or selecting an image, customize the image details in your Media Library, such as the Title, Caption, Alt Text, and Description. This data is helpful for SEO, accessibility, and helps you search for files in your media library.
If an image includes a caption, WordPress automatically displays it. You can hide or show image captions in the block toolbar.
Resizing images
After adding an image to the editor, you can resize and align it to better fit the surrounding content.
To resize an image:
- Click on the image to reveal the draggable resize handles.
- Click on the resize handles and drag the image to your desired size.
Detailed instructions on adding blocks
Block toolbar

Each block has its own block-specific controls that allow you to manipulate the block right in the editor. The Image block contains the following options:
- Transform to
- Move controls
- Change alignment
- Apply duotone filter
- Link
- Crop
- Add text over image
- Add/remove caption
- Replace
- More options
Transform to

The Transform to tool allows you to convert the Image block into Columns, Group, Gallery, Cover, Details, File, or the Media & Text block. You can apply any style options your theme makes available for the block.
Move controls

Click the grab handle (six dots button) to move the block to a new location on the page. A blue separator line shows where WordPress will place the block.
Use the up and down arrow buttons to move the block up and down on the page
Get more information about moving a block within the editor.
Change alignment

Use the Change alignment tool to modify the alignment of the Image block. Select the tool and pick one of the following alignment options:
- None – Leaves the block the current size
- Wide width – Increase the width of the post beyond the content size
- Full width – Extend the block to cover the full width of the screen
- Align left – Align the block to the left
- Align center – Center the block
- Align right – Align the block to the right
Wide width and Full width only display if your theme supports these width options.
Wrap text around images
You can wrap text around an image by aligning the image to the left or right.
- Add the image directly above the paragraph.
- Select the image.
- Resize the image to be smaller.
- In the block toolbar, select Align left or Align right.
- The paragraph text will wrap around the image.
For best results, use this option with smaller images. Large images can make the text hard to read, especially on mobile devices.
Duotone
The block toolbar provides a quick action for applying duotone colors to images, which will recolor your image. Available color options vary by theme.
Link

You can choose link options to apply to an image. Options include the following:
- Search field – Paste a URL or search for a page, post, or other content on your site to link the image.
- Link images to image file – Link image to the image file in a new browser window.
- Link images to attachment page – Link the image to its WordPress media attachment page.
- Enlarge on click – Lets visitors open the image in a larger view, known as a lightbox, without leaving the page to see more detail.
Crop

Use the Crop button in the block toolbar to make basic edits to an image directly in the editor. After clicking on the Crop button, you can select from the following options:
- Zoom in or out on the image.
- Change the Aspect Ratio to crop the image to a specific shape.
- Rotate the image if it appears sideways.
After making changes, select Apply to update the image in the block.
Note: WordPress saves the edited version as a new image file, so the original image remains available in your Media Library.
Undo changes

After applying changes to an image, you can revert them using the Undo option in the action notice or the Undo button in the top-left of the block editor next to the + Block Inserter button.
Add text over image

Use the Add text over image button to change an Image block into a Cover block. This lets you place text on top of the image.
When you select Add text over image, the Image block immediately changes into a Cover block with placeholder text. Replace the placeholder text with your own text.

Use this option when the image is decorative or when the text can remain readable over the image. For better readability, adjust the overlay color or opacity in the Cover block settings.
Captions

Click the Add caption button in the block toolbar to show or hide a caption for an individual image.
- Select the Add caption button in the block toolbar.
- Select the Image block and enter your caption in the space below the image.
- To hide the caption, select the Add caption button again.
Replace

Use the Replace button to select a new image from the Media Library, Upload a new image, or Reset the image block back to it’s initial setup options.
More options
The More options menu (three dots) includes common block actions, such as copy, duplicate, lock, and edit as HTML.
The Image block also includes a Set as featured image option. Use this option to set the selected image as the featured image for the post or page.

Read about the More options menu and its settings.
Block settings

Every block has specific options in the editor sidebar in addition to the options found in the block toolbar. If you don’t see the sidebar, click on the Settings button next to the Save/Publish button.
The Image block settings panel is divided into three tabs – Content, Settings, and Styles.
Content

Select the image thumbnail or file name under Media to upload a new image, choose one from the Media Library, or reset the image. You can also use the Media options menu (three dots) next to Media to reset the image or alternative text.

Alternative text
Adding alternative text directly in the Media Library sets it as the default for that image. When you insert the image into a page or post using the block editor, this alt text will automatically carry over. Keep in mind that if you change the alt text within the block settings later, that edit only applies to that specific page or post.
Settings
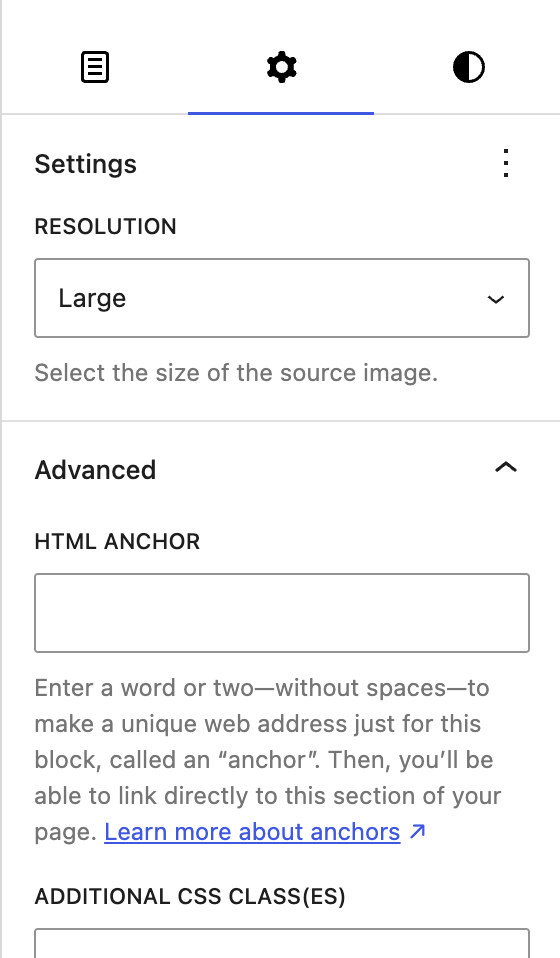
Resolution
You can also choose the Resolution of your image with options that may include Full Size, Large, Medium and Thumbnail depending on what your theme supports and the size of the originally uploaded image.
Learn more about image size and quality
Advanced
The Image block provides the following Advanced settings options: HTML Anchor, Additional CSS Class(es), Additional CSS, Title attribute, and Styles.
Use the Title attribute to describe the role of this image on the page, however many devices and browsers don’t display this text.
Learn more about advanced settings
Styles

Style options
The Styles section appears if your theme includes custom image style options. The available styles may vary, but common options include Default and Rounded. The Rounded style adds rounded corners to the image.
Filters
You can create a filter effect on images without actually changing the original image. The Duotone filter option allows you to add this filter color to your block content from the block toolbar.
Read more about the filter options.
Dimensions
The Image block provides dimension settings options to change margin size.
For details refer to this support article: Dimension settings overview
Aspect ratio
Use Aspect ratio to change the shape of the image on the page, such as square, portrait, or landscape. Some aspect ratios may visually crop the image to fit the selected shape. This only changes how the image appears on the page. It does not edit the original image file.
Choosing an aspect ratio may show additional settings, including Width and Height, Scale, and the Focal point picker.
Width and height
Use Width and Height to set the display size of the image.
In most cases, leave these fields set to Auto. To resize the image, set the Width value and let the height adjust automatically. Use percentages only when you want the image to scale relative to its container.
Avoid setting a fixed height unless the image needs to fit a specific design, because it can make the image harder to control across different screen sizes.
Scale
Use Scale to control how the image fits inside the selected aspect ratio.
- Cover – Fills the entire image area. Parts of the image may be cropped so there are no empty areas.
- Contain – Shows the full image. This may leave empty space around the image if its shape does not match the selected aspect ratio.
Focal point
Use Focal point to choose which part of the image stays in view when the image has an aspect ratio set. This setting is most useful when Scale is set to Cover, because Cover may crop part of the image to fill the selected aspect ratio.
Border & Shadow
The Image block provides border settings options to add border color, width, radius and shadow.
For details refer to this support article: Border & Shadow Settings overview
Changelog
- Updated 2026-06-13 (props to @zadarr @kjoyner)
- Updated formatting and content to match doc styleguides
- Refactored “Copy images from a document” section
- Updated 2026-05-24 (props to @kjoyner @awetz583 @annezazu @ntsekouras @sirlouen @wildworks)
- Updated screenshots and video for WordPress 7.0 updates
- Updated content include aspect ratio, scale, height and width, and focal point controls
- Expanded block toolbar section to include all options
- Expanded “Add an image block” section
- Updated “Advanced Settings section” to refer to new parent page
- Reduced or updated content with plain language alternatives
- Updated 2026-03-02 (props to @hu55nain @madtownlems @CalolanC @anujrathore24 @awetz583)
- Updated block toolbar screenshots
- Updated block settings screenshots
- Added caption button screenshots and information
- Updated Advanced settings screenshot and info
- Added information for resolution under settings
- Added border and shadow info
- Updated 2025-11-10 (props to @nikunj8866)
- Add the Undo option.
- Add “Set as Featured Image” option.
- Update 2024-01-25 @milana_cap
- Updates for 6.2 completed
- Allow dropping an image on an empty paragraph block to create an image block
- Updates for 6.3 completed
- Display custom borders on image placeholder
- Upload Openverse images when inserted
- Allow dragging-and-dropping images from the inserter to image blocks
- Updates for 6.4 completed
- Update 2024-01-16
- Updates for 6.1 completed
- Re-upload missing images
- Update 2023-12-25
- Update screenshots and videos for 6.4
- Update 2022-12-12
- Added Border settings
- Updates 2022-11-28
- Added missing image caption
- Replaced content on more options
- Updated 2022-03-15
- Added notes about converting cover block from toolbar.
- Updated 2022-01-25
- Updated a few screenshots to align with expanded toolbar.
- Added notes about using duotone.
- Updated 2021-01-04
- Updated all screenshots to WordPress 5.6
- Added section on image title attribute (Gutenberg 6.9/WP 5.4)
- Added section about easy upload for external images (Gutenberg 8.5/WP 5.5)
- Added section about block editor image editing (Gutenberg 8.4/WP 5.5)
- Added details on HTML Anchor and Image Styles to Advanced
- Removed pencil (edit) icon and added more option menu
- Removed some out-of-date content
- Re-ordered to match the current block toolbar layout
- Updated 2020-06-18
- Added ‘Link back to blocks’ to the top of the page
- Added the ‘Changelog’
- Created 2019-03-07
Was this article helpful? How could it be improved?
Log in to submit feedback. If you need support with something that wasn't covered by this article, please post your question in the support forums.