The Template Editor allows you to edit and create templates, using blocks. These templates control the layout of the posts, pages, or page types on your site.
The Template Editor is only available if your site is using a block theme or a classic theme that has enabled the Template Editor on the backend.
About Templates
WordPress uses templates to create the layout and structure for posts, pages, or specific page types on your site page. There are a few base templates that are generated when you select a theme. For example:
- The Home template is used to display the site’s home page if your site is set up to display the latest posts on the home page.
- The Index template is used to display the index page of all the blog posts.
- The Page template is used to display the site’s pages if no specific templates are assigned to the page.
- Many block themes offer other built-in templates like the Single Post template to customize the layout of single blog posts, the 404 template to customize the layout of the 404 error page, the Search template to customize the layout of the search results page, and the Archive template for categories/archives page, etc.
In addition, your block theme may come bundled with custom templates.
In the Template Editor, you can find all the templates on your site, including any custom templates you created and the ones that came bundled with your theme. You can edit these templates and create custom layouts using blocks.
When you make changes to a template, the editor updates the blocks on all pages/posts that use the template. These changes take precedence over your theme’s bundled template files.
What you need, to use the Template Editor
To work with the Template Editor, you need to use a block theme on your site. A block theme is a theme that uses blocks for all parts of a site, including navigation menus, header, content, and site footer.
All blocks that are available in the WordPress Block editor can be used in the Template Editor. To find block themes, from the WordPress dashboard, go to Appearance > Themes and click Add New. In the Add Themes page, select Block Themes to find the growing list of Block themes in the WordPress theme directory.

Once you install and activate a Block theme on your site, go to Appearance > Editor to open the Site Editor.
Two ways to access the Template Editor
There are two different ways you can access the Template Editor depending on what type of theme you are using:
- If you are using a block theme, you can access the Template Editor when editing posts or pages via the WordPress Block Editor and also via the Site Editor.
- If you are using a classic theme that has enabled the Template Editor on the backend, you can access the Template Editor only when editing posts or pages via the WordPress Block Editor.
How to use the Template Editor via the WordPress Block Editor
To use the Template Editor via the WordPress Block Editor, make sure your site is using a block theme or a classic theme that has enabled the Template Editor on the backend.
To edit a template
- Click Posts > Add New to add a new post or Pages > Add New to add a new page.
- This opens the WordPress Block Editor.
- Navigate to the Post/Page Settings sidebar tab.
- Under the Summary section, click the name of the template. A popup will appear. Click Edit template.
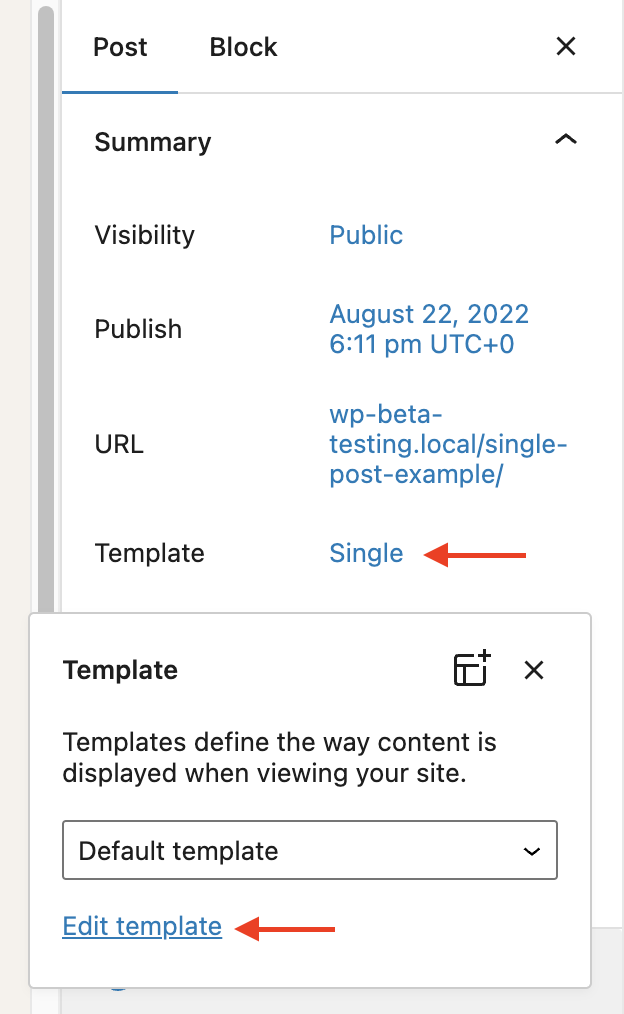
The Edit option is only available if you are using a block theme that lets you edit custom templates.
- This opens the Template Editor and takes you to the template editing mode where you can make changes to the selected template. To go back to the WordPress Block Editor and continue making content changes, click the Back link in the top panel of the editor.

- When you’re done making changes, select Publish. This will prompt you to save all the changes you made including the template and the post or page.
- Click Save to confirm the changes.
When you make changes to a template, the editor updates the blocks on all pages/posts that use the template
To create a new custom template
- Click Posts > Add New to add a new post or Pages > Add New to add a new page.
- This opens the WordPress Block Editor.
- Navigate to the Post/Page Settings sidebar tab.
- Under the Summary section, click the name of the template. A popup will appear. Click the add template icon in the top right corner.

This option is only available if you are using a block theme that lets you create custom templates.
- This opens a dialog box where you can give a name for the custom template you are about to create. Make sure to give it a descriptive name that describes the purpose of the template e.g. “Full Width”.
- Click Create to open the Template Editor and go to the template editing mode where you can build the custom template using blocks. To go back to the WordPress Block Editor and continue making content changes, click the Back link at the top left corner.
- When you’re done making changes, select Publish. This will prompt you to save all the changes you made including the template and the post or page.
- Click Save to confirm the changes.
How to use the Template Editor via the Site Editor
To navigate to templates
- Go to Appearance > Editor to open the Site Editor. You will be taken to an interface showing a preview of your site and a dark gray sidebar where you can navigate between your templates, template parts, and other aspects of your site.
- To view the list of templates available for your site and switch between templates:
- If you are already in a template, click on the WordPress icon (or Site icon if you have set one) to open the Site Editor left navigation.If you are just entering the Site Editor, skip this step.
- Click on Templates to view the list of templates.
- Click on any template name from the list to preview that template and see a description of what the template does.
To edit a template
- From the Site Editor (Appearance > Editor), click on Templates to view the list of templates on your site, including any you have created and any that come with your theme. If you are already editing a template, click on the WordPress icon (or Site icon if you have set one) to open the Site Editor left navigation.
- Click on any of the templates in the list to to preview that template and see a description of what the template does. From there, you can either click the pencil icon or on the template itself to edit it directly and customize the layout of the selected template using blocks.
- When you are done with the template customization, click Save.
When you make changes to a template, the editor updates the blocks on all pages/posts that use the template.
- To go back to the overall view of the Site Editor, click on the WordPress icon (or Site icon if you have set one) to open the Site Editor left navigation.
To add a new template
The Template Editor displays the templates that you can add to your site.
- From the Appearance > Editor, click on Templates to view the list of templates on your site, including any you have created and any that come with your theme. If you are already editing a template, click on the WordPress icon (or Site icon if you have set one) to open the Site Editor left navigation.
- Click the + button in the top right corner of the sidebar to the optional types of new templates you can add to your site.

- Front Page – to display the home page of your site if your site is set up to display a regular page for the home page.
- Page – It allows the creation of templates that can be applied to a specific page on the site or as the default page template (if not already defined by the theme).
- Author – It allows the creation of templates that can be applied to posts by a specific author on the site or as the default template for all authors (if not already defined by the theme).
- Category – It allows the creation of templates that can be applied to posts by a specific category on the site or as the default template for all categories (if not already defined by the theme).
- Date – It allows the creation of templates that can be applied to posts by date (if not already defined by the theme).
- Tag – It allows the creation of templates that can be applied to posts by tag (if not already defined by the theme).
- Taxonomy – It allows the creation of templates that can be applied to posts by a specific taxonomy term (if not already defined by the theme).
- Single item: Post – It allows the creation of post-specific templates.
- Custom Template – A template that can be applied to any post or page
You can also go to Templates > Manage all templates and select the Add New button to add the same templates listed above.
If you already added a template from the Template Editor (for eg: Front Page), it will not display that template name (in this case, Front Page) in the drop-down menu, when you try to add a new template.

Once you select the template to add, you will be shown an option to start the template with content from one of the existing patterns in the site. This means you can start with content already in the template, or start from scratch. You can design the layout further by adding or removing blocks from the template.
To add a new Page template
To create a custom page template, select Page from the drop-down menu after you choose to add a new template.
A new dialog will appear listing all the pages on your site. If your site has more than 10 Pages, the dialog box will also show a Search box and you can search by the Page name to find the one you are looking for.
You can select a specific page to apply the template. Once you select the page, you are taken to the Template Editor where you can design the layout of the template.

To add a single template for all post types and specific post types
Selecting Author, Category, and Single item: Post allows you to create a single template for all the post types or a specific template for a certain post type. This is helpful, for example, if you want to show a grid of posts for a specific “photography” category but not change the default list style for others.
To create a custom category template, select Category from the drop-down menu, after you choose to add a new template. A new dialog will appear with two choices:

All Categories – for creating the default category template. This is used as a fallback when a more specific category template does not exist.
Category – for creating a custom template for an individual category. Selecting this option will open a new dialog listing all the categories on your site. . If your site has more than 10 Categories, the dialog box will also show a Search box and you can search by the Category name to find the one you are looking for.

Once you make your choice between All Categories or Categories you will be taken to the Template Editor, where you can design the layout of the template.
To create a custom author template, select Author from the drop-down menu, after you click on the Add New button in the Template Editor. This will open up a dialog where you can choose between creating one template for all the authors (All Authors) or a specific template for a certain author(Author). If you choose a specific template for an author, you will be prompted to choose from the list of authors on your site.


To create a post-specific template, select Single item:Post from the drop-down menu after you choose to add a new template. This will open up a dialog where you can choose between creating one template for all the Posts (All Posts) or a specific template for a certain Post (Post). If you choose a specific template for a Post, you will be prompted to choose from the list of Posts on your site.


To add an archive and single template for custom post types
Archive and Single item: If your site has Custom Post Types, like testimonials, movies, books, or recipes, you will also be able to create a separate template for their archive pages or single posts.
For eg: to create a custom archive template for a specific custom post type eg: Testimonial, select Archive: Testimonial from the drop-down menu, after you choose to add a new template. This will open the Template Editor pre-populated with the content of the Custom Post Type. This means you would be presented with content already in the template rather than starting from scratch. You can design the layout further by adding or removing blocks from the template.

To create a single template for a single item in the Custom Post Type eg: Testimonials, select Single item: Testimonial from the drop-down menu, after you choose to add a new template. A new dialog will appear with two choices:

All Testimonials: for creating the default single template for all single items in the Custom Post Type. This is used as a fallback when a more specific single template for that custom post type does not exist.
Testimonial: for creating a single template for an individual item in the Custom Post Type (in this example Testimonial). Selecting this option will open a new dialog listing all the items on your site for that Custom Post Type (in this example Testimonial). Once you make your choice between All or Single Item for the Custom Post Type you will be taken to the Template Editor, where you can design the layout of the template.

To create a new custom template
A custom template can be assigned to any post, page, or custom post type.
When you add a new template from the list of choices provided in the Template Editor, they are automatically assigned to their respective page, post, or post type. For eg: The Author template gets automatically assigned to posts based on authors. When you create a new custom template, it is not assigned to anything specific until you assign a template to the post or page.
To create a custom template, select Custom Template from the drop-down menu, after you choose to add a new template. In the dialog that appears, give a name for the new custom template and click Create. Make sure the name describes the template eg: Post with sidebar.

In the dialog that appears, give a name for the new custom template and click Create. Make sure the name describes the template eg: Post with sidebar.

You will be taken to the Template Editor pre-populated with content and you can design the layout of the template further by adding or removing blocks.
How to assign a custom template to a post or page
- From the WordPress Dashboard, open the post or page that you want to assign the template.
- This opens the WordPress Block Editor.
- Navigate to the Post/Page Settings sidebar tab.
- Under the Summary section, click the name of the template. A popup will appear.
- In the popup, open the drop-down list to find the list of all custom templates. Pick the template you want to assign to the post or page.

Changing a page’s template affects that page only (not your entire site.)
How to rename custom templates
You can only rename a custom template that you created. This means the default templates in WordPress and custom templates that came bundled with your theme cannot be renamed.
There are two ways you can rename custom templates:
From the detail view of the template
- Click on Templates to view the list of templates on your site.
- Click on the custom template you created, that you want to rename. This will display a preview of the template along with its details.
- In the detail view of the template click the three-dot icon next to the title and select the ‘Rename’ option in the menu that appears.
- This will open a dialog box where you can type in a new name for the custom template you selected. Make sure the name describes the template eg: Post with sidebar.
- Click Save to save the custom template with the new name.
From the templates list in the Template Editor
- Click on Templates to view the list of templates on your site.
- Click the three-dot menu icon next to any of the custom templates you created. From the drop-down menu and select Rename.
- This will open a dialog box where you can type in a new name for the custom template you selected. Make sure the name describes the template eg: Post with sidebar.
- Click Save to save the custom template with the new name.
Clear customizations to templates in your block theme
When changes are made to templates that came bundled with your block theme, you will see the option to clear customizations.
You can see whether a template has been customized in 2 locations.
- In the detail view you will see an additional ‘customized’ label on templates with customizations.
- When viewing the details of the template you will see a note indicating when the template was last updated, at the bottom of the details column.


This feature is only available for the templates that you have already customized. If you don’t find this option, it means your template is already in its default state.
There are three ways you can clear customizations:
From the actions in the template detail view
- Click on Templates to view the list of templates on your site.
- Click on the custom template you created, that you want to rename. This will display a preview of the template along with its details.
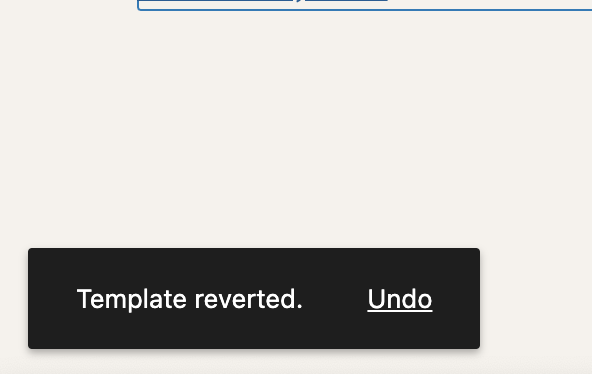
- Click the the three-dot menu icon near the template name which opens a drop-down menu. Click Clear customizations in the drop-down menu. Note that this option only appears if customizations have been done and saved. You will see a message at the bottom left corner of the window Template reverted.

From the templates list in the Template Editor
- Click on Templates to view the list of templates on your site.
- Scroll down and click on Manage all templates. This will take you to a list of your templates.
- Click the three-dot menu icon to open a drop-down menu and select Clear customizations. This will reset the template to the default state and you will lose the changes you made to that template.

From the Settings sidebar within a template
- Click on Templates to view the list of templates on your site.
- Click on the template you want to clear customizations for. This will open the template in the Template Editor.
- Click the three-dot menu icon in the Template settings sidebar. This will open a drop-down menu. Select Clear customizations. This will reset the template to the default state and you will lose the changes you made to that template. You will see a message at the bottom left corner of the window Template reverted.

How to delete a template
You can only delete the custom templates that you created, in either of two different ways:
From the actions in the template detail view
- Click on Templates to view the list of templates on your site.
- Click on the custom template you created, that you want to delete. This will display a preview of the template along with its details.
- Click the the three-dot menu icon near the template name which opens a drop-down menu, and select the ‘Delete’ option.
- Confirm you want to delete the template in the dialog that displays, and you will be notified once it is complete.
From the templates list in the Template Editor
- Click on Templates to view the list of templates on your site.
- Scroll down and click on Manage all templates. This will take you to a list of your templates.
- Click the three-dot menu icon of a custom template you created, that you want to delete and click the ‘Delete’ option.
- Confirm you want to delete the template in the dialog that displays, and you will be notified once it is complete.
Resource Links
- Deeper customization with template options
- Workshops
- Courses
Changelog:
- Updated on July 8th, 2023
- Updated content, videos and Screenshots for 6.3.
- Updated on March 27th, 2023
- Updated content, videos, and screenshots for 6.2.
- Removed references to “Beta” for the Site Editor.
- Updated on October 20th, 2022
- Updated content, videos, and screenshots for 6.1
- Updated resources section to remove external links and add links to Learn workshops and courses
- Updated on May 22, 2022
- Adding 6.0 features. updating screenshots and videos and reworking content.
- Edited to add in content around the Site Editor on January 5, 2022
- Edited to add in an additional Resource item on July 30, 2021
- Created on July 11, 2021
Was this article helpful? How could it be improved?
Log in to submit feedback. If you need support with something that wasn't covered by this article, please post your question in the support forums.